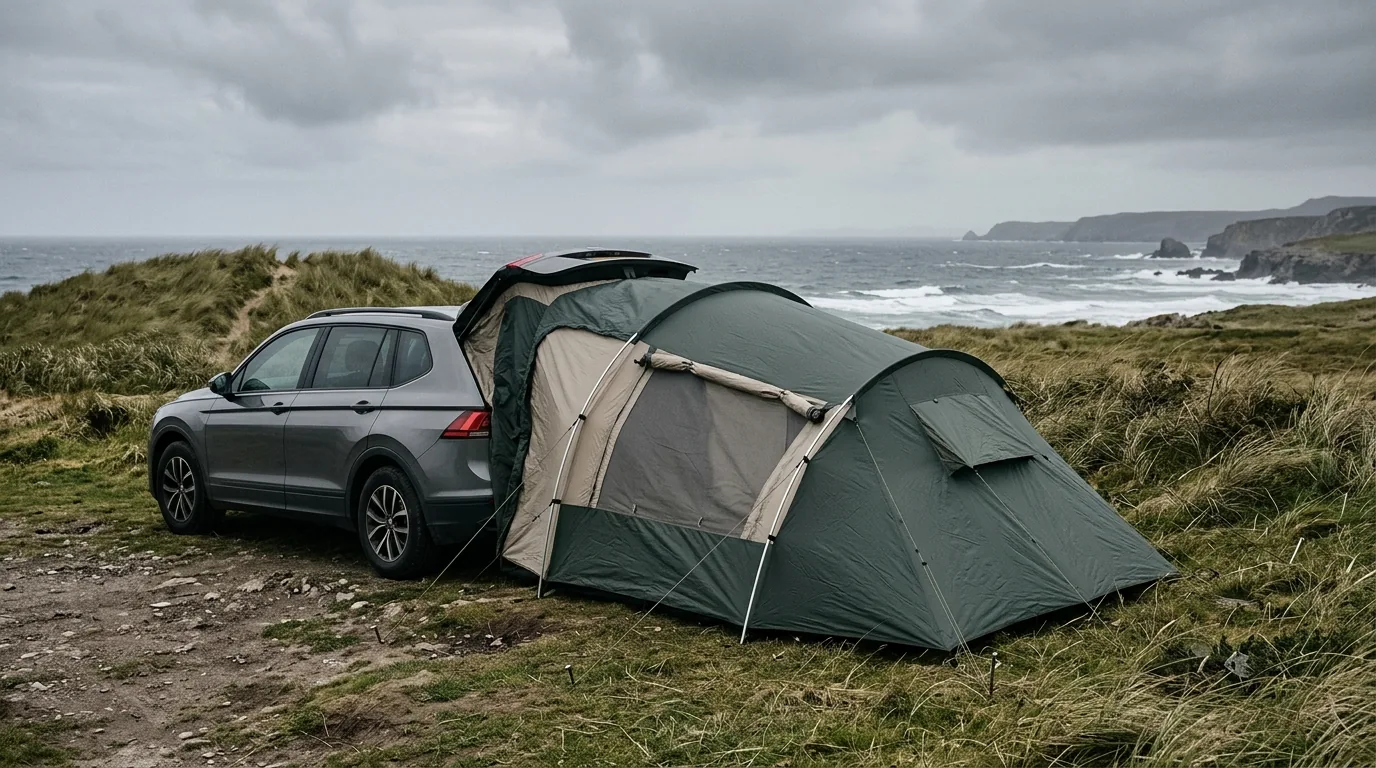
A vehicular camping tent turns a car, SUV, or truck into a sheltered basecamp while adding the stability needed for breezy ridgelines and exposed coastal sites. When the forecast turns, the difference between “camping” and “hanging on” often comes down to structure, anchoring, and smart site selection—not just thick fabric. Below are the core wind-resistant features to look for, how to pitch for fewer flaps and drafts, and what to verify for fit, comfort, and safe storm readiness.
If you’re shopping for a purpose-built option, consider the Windproof Vehicular Camping Tent for a road-trip-friendly shelter that’s designed around vehicle connection and more stable pitching. For drivers planning longer mileage days to reach calmer campsites, Smart Driving Explained – Driver Assistance Systems Guide can help you better understand modern driver assistance features that reduce fatigue during changing weather and nighttime arrivals.
Wind resistance is less about a single “storm rating” and more about how the tent sheds gusts, distributes load, and stays anchored when conditions are inconsistent.
A wind-ready pitch starts before you leave home. Compatibility and footprint planning prevent last-minute compromises—like skipping guy lines because there isn’t room.
For general guidance on safer decisions during changing conditions, consult National Park Service camping safety recommendations and keep an eye on evolving local alerts.
The goal is a smooth, evenly tensioned shell that doesn’t flap, inflate, or transfer shock loads into a single corner.
When winds increase quickly, follow practical safety guidance from the NOAA National Weather Service wind safety resource and relocate to shelter if conditions exceed what your anchoring and site can support.
| Feature | Why it matters in wind | What to look for |
|---|---|---|
| Profile and shape | Reduces drag and buffeting | Lower peak height, tapered windward end, minimal flat panels |
| Pole strength and intersections | Limits bending and collapse risk | Thicker poles, reinforced hubs, multiple cross points |
| Guy-out points | Stops panel pumping and flapping | Windward + mid-panel guy-outs, sturdy webbing, tensioners |
| Stake compatibility | Keeps the base from walking in gusts | Support for longer stakes, extra stake loops, wide-angle anchoring |
| Vehicle connection system | Stabilizes the transition zone | Adjustable straps, secure sleeve/awning connection, minimal gaps |
| Seams and coatings | Prevents wind-driven rain leaks | Taped seams, robust floor coating, storm flaps on zippers |
For broader severe weather readiness habits—especially if you travel through multiple climates in one trip—review Ready.gov guidance and build a simple decision rule for when to pack up and move.
If gusts are strong enough that stakes won’t hold, poles visibly deform, or the tent repeatedly loses tension, it’s time to relocate to a more sheltered site or pack up. Treat local wind advisories and warnings as a cue to avoid exposed ridgelines, beaches, and open flats.
Yes—vehicle attachment stabilizes the connection point but does not replace stakes and guy lines that keep the tent body from shifting or lifting. In calm weather you may get by with minimum corner staking, but in wind you should use full anchoring and all guy-out points.
Re-tension the fly after it relaxes (often 10–20 minutes after setup), use every available guy point, and orient the lowest profile side into the wind. If the tent supports it, adding extra guy lines to large panels can further reduce pumping and noise.




Leave a comment